Create the First Xncf Module
Preface
There are two ways to create an Xncf module:
- The manual way is to create the
Registerclass and implement a series of interfaces according to the requirements in About Xncf.You can refer to here for the manual creation method.
- [Recommended] Use the UI visual configuration method to automatically create the module. It is worth mentioning that this feature for creating Xncf modules is also provided by an Xncf module named Senparc.Xncf.XncfBuilder.
The following introduces the method of creating the basic code of the Xncf module using the "0 code" creation method.
Install Senparc.Xncf.XncfBuilder
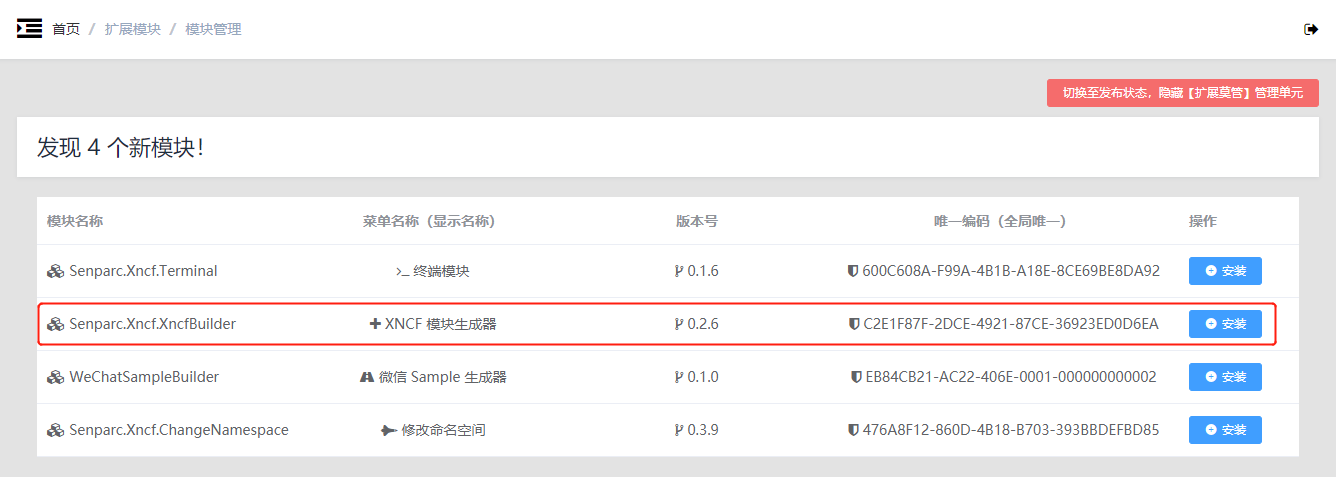
Run the NCF project, go to the [Module Management] menu, find the XNCF Module Generator (Senparc.Xncf.XncfBuilder) in the "Newly Discovered Modules" list, and click the [Install] button:
After installation:
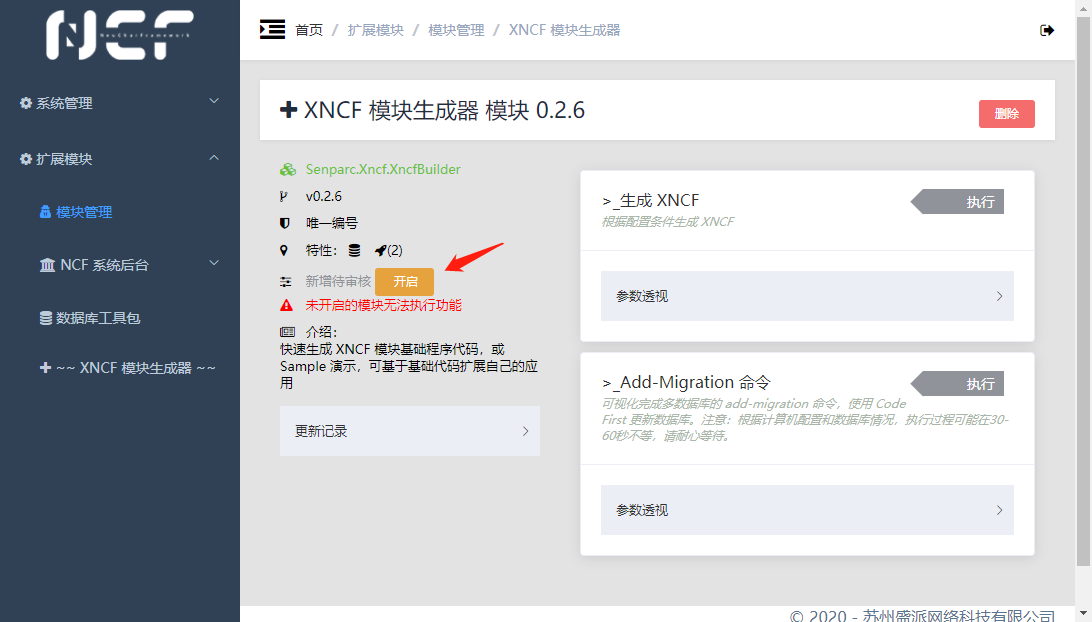
Enable Senparc.Xncf.XncfBuilder
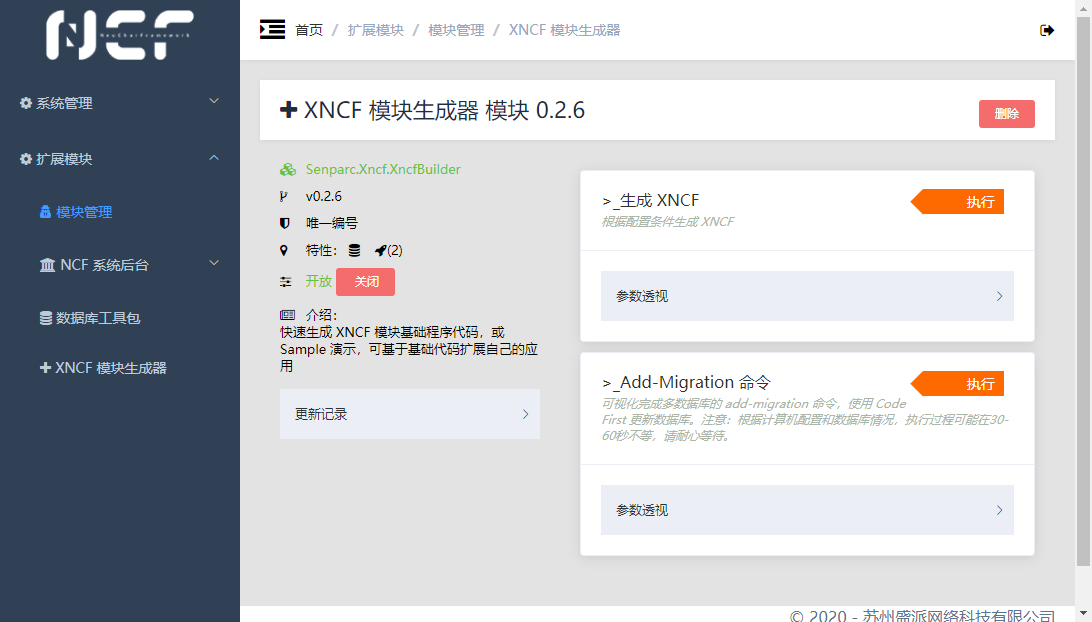
Click the [Enable] button to enable this module:
Set Xncf Module Information
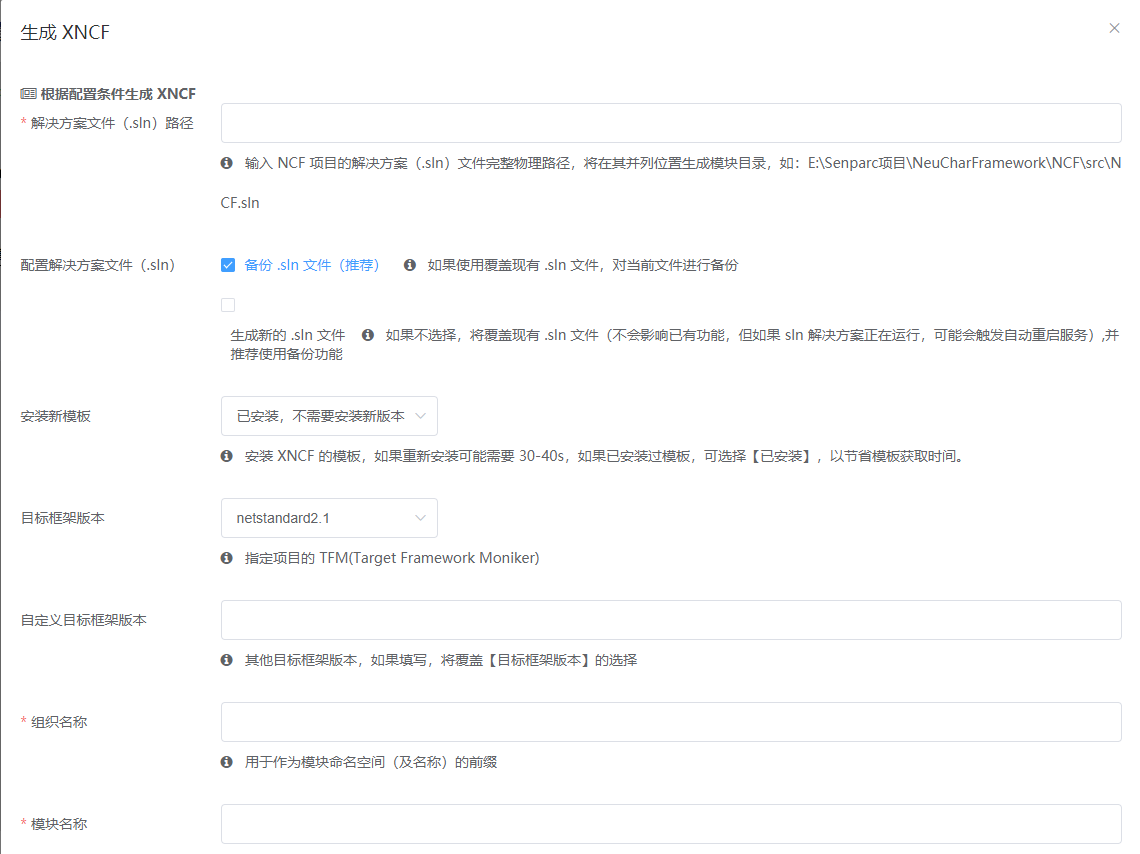
Click the [Execute] button on the right side of [Generate XNCF] to set the information for the Xncf to be generated:
Tip
- All parameters have explanations, so they will not be repeated here. It is particularly worth mentioning that:
The [Solution File (.sln) Path] parameter can be the path of the solution file of the currently running NCF project, or it can be the solution file path of any other NCF project (for example, sometimes we develop multiple projects simultaneously using multiple solutions). The new Xncf module project will be automatically added to the specified solution. Because of this, if the specified solution is running a web site (such as IISExpress), the site will automatically restart because the solution file will be modified.- The organization name entered above is
MySenparc, and the module name isMyApp, so it can be inferred that the full name of the final module is:MySenparc.Xncf.MyApp.
(This article takes the currently running NCF.sln as an example.)
In addition to the above basic information, you can continue to scroll down to see the [Function Configuration] options. If you need the basic code for the module configuration corresponding function (implementing the corresponding function interface), you can check it.
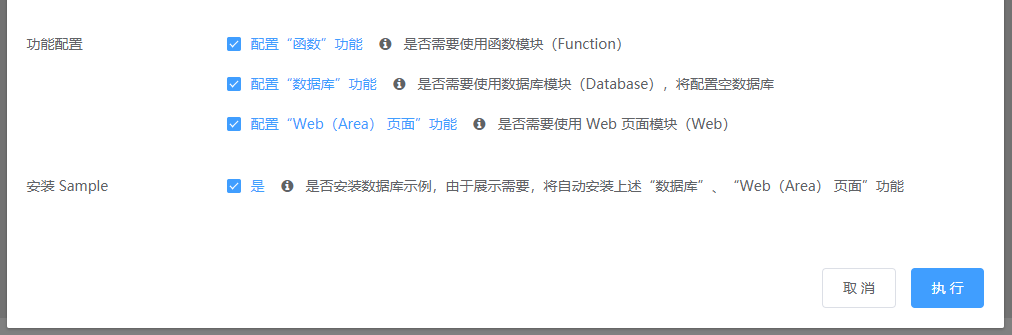
At the bottom is the [Install Sample] option. If this is your first time using NCF, it is strongly recommended that you check this option. The installed Sample will show you a multifunctional Xncf module that includes a database, functions, and web pages, allowing you to understand the composition of Xncf and the implementation of corresponding functions more vividly and concretely. Of course, in addition to this, the code in the Sample can also provide a reference for creating your own business code.
Install Xncf Module Template
First, check if the Xncf Module template is installed locally
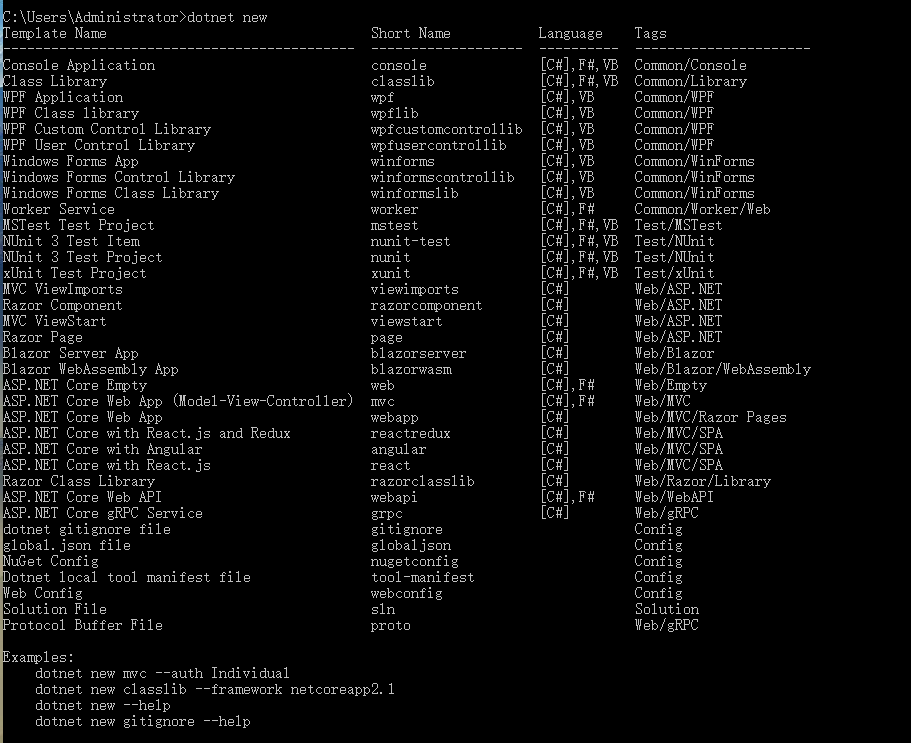
If not, you need to execute the following command to install it
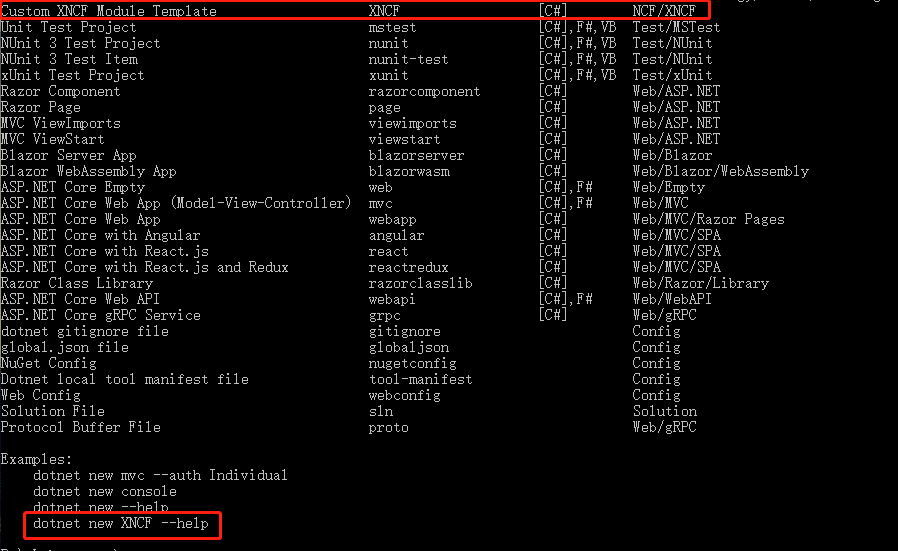
dotnet new --install Senparc.Xncf.XncfBuilder.TemplateAfter installation, execute dotnet new again to display the content as follows
Nuget address: https://www.nuget.org/packages/Senparc.Xncf.XncfBuilder.Template
Generate Xncf
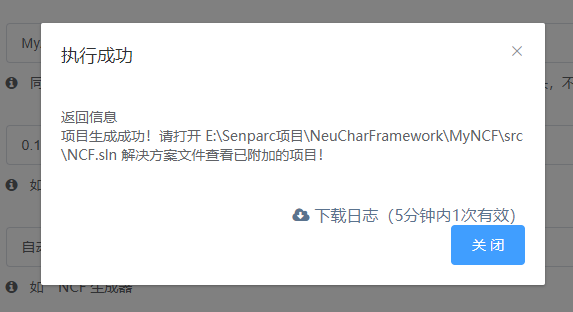
Check the information, confirm that it is correct, and click the [Execute] button. In about 0.5 seconds, the creation of the customized Xncf project will be completed:
Load Xncf Module
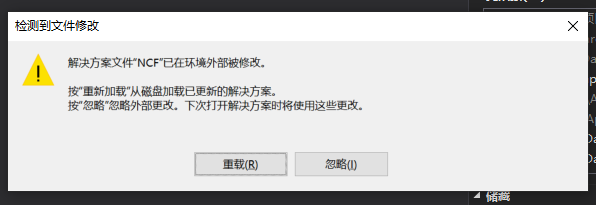 > **Tip:** Since the currently set .sln file is the solution of the currently running site, the [Download Log] button in the success prompt will be invalid. Return to Visual Studio. When the new Xncf module code is automatically created, it will be automatically added to the NCF.sln solution, so you can see this prompt: Click the [Reload] button to reload the solution. In the [Solution Explorer], you can see that the new project `MySenparc.Xncf.MyApp` has been automatically created, and it is still "0 code":
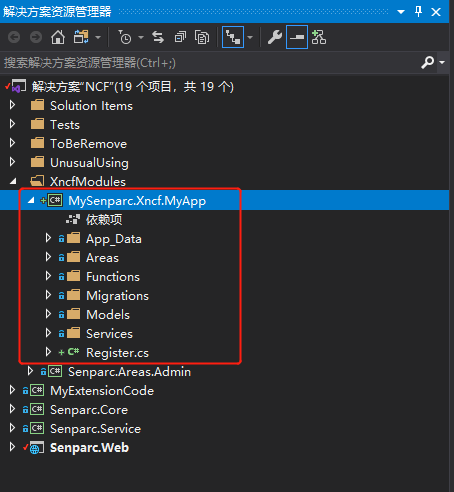
Install and Enable MySenparc.Xncf.MyApp Module
Continue with the "0 code" approach, directly press Ctrl + F5 to run the Senparc.Web project and enter the backend:
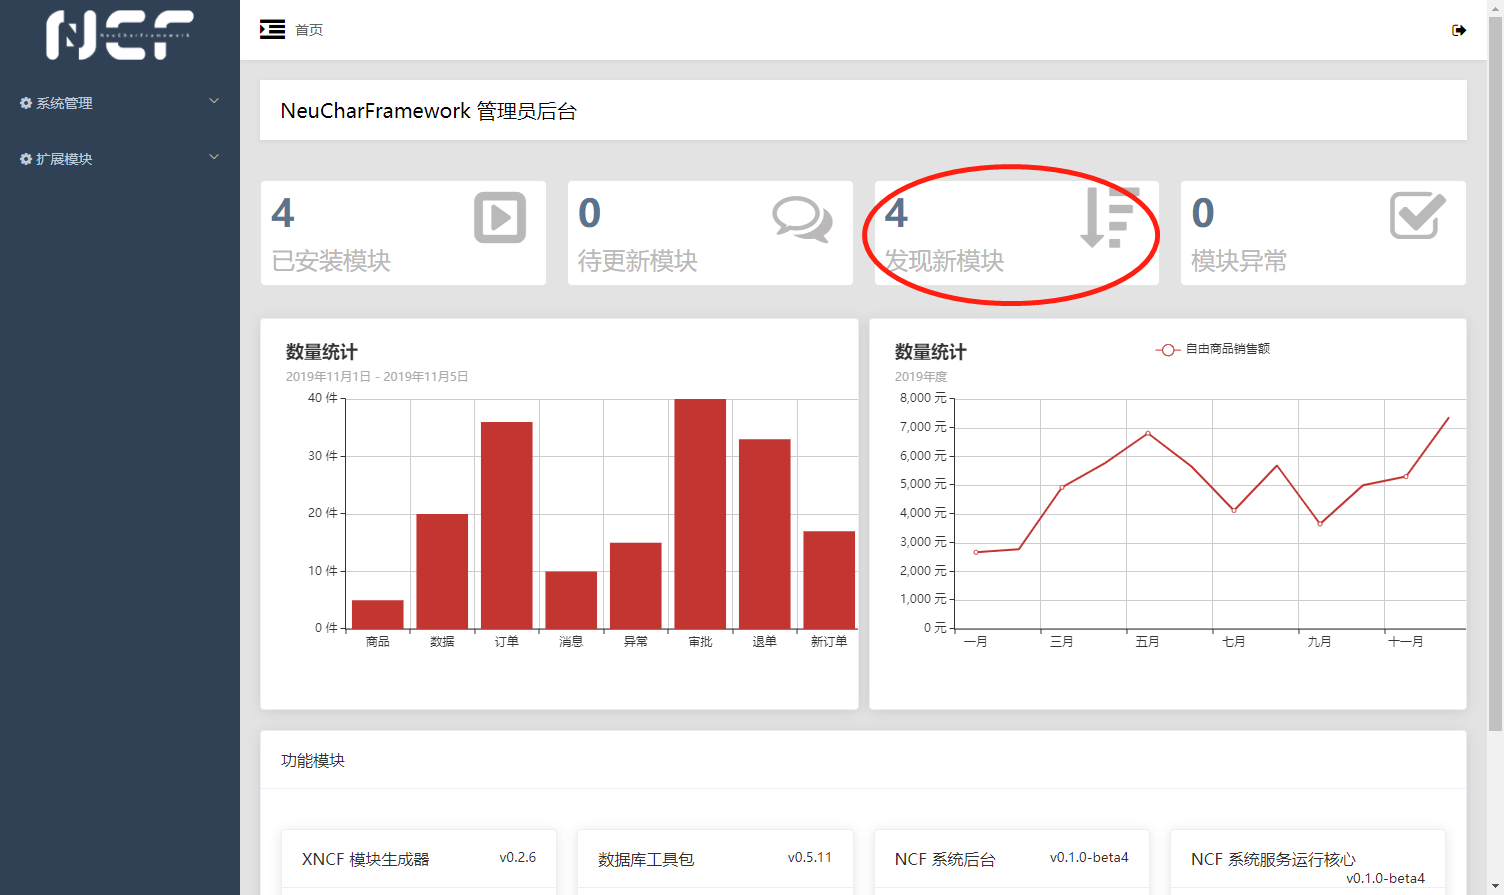
At this point, you can see that the number of "Newly Discovered Modules" has changed from 3 to 4. Click this tab to enter the [Module Management] page, where you can see the MySenparc.Xncf.MyApp module automatically generated by the above operation in the "Newly Discovered Modules" list. The menu display name is Automatically Generated Module, consistent with the settings:
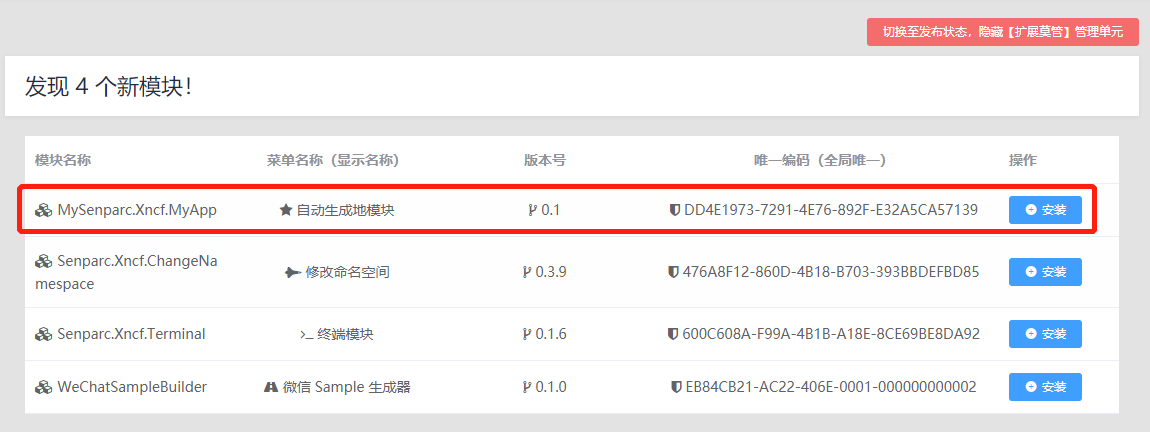
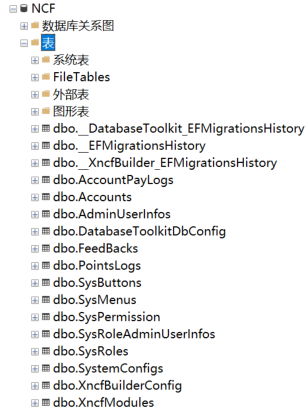
When we click the corresponding [Install] button on the right, we can complete the installation of this custom module. However, before that, to understand the changes in the database, let's first look at the current database tables (taking SQL Server as an example):
Return to the webpage, click the [Install] button on the right side of MySenparc.Xncf.MyApp to complete the module installation, and click the [Enable] button to activate the module.
Before "enabling", you can already see the changes in the database tables:
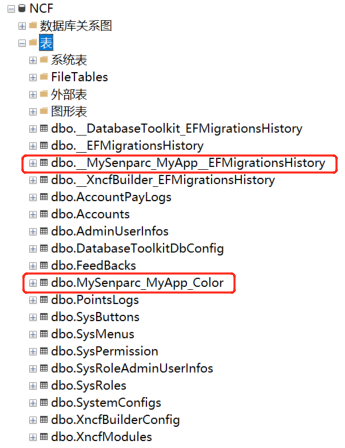
The installation process automatically added 2 tables to the database:
| Table Name | Description |
|---|---|
| MySenparc_MyAppEFMigrationsHistory | Historical version records of EFCore database migration and upgrade, automatically modified by EFCore during migration operations (Migration) |
| MySenparc_MyApp_Color | Since the [Install Sample] option was checked, this database is used to demonstrate the sample database operations in the Sample |
Tip: In the automatically generated table names, you can see the prefix
MySenparc_MyApp. The advantage of this is that even if different organizations release modules with the same name (such asMySenparc.Xncf.MyAppandYourSenparc.Xncf.MyApp), they can be well compatible and will not conflict.
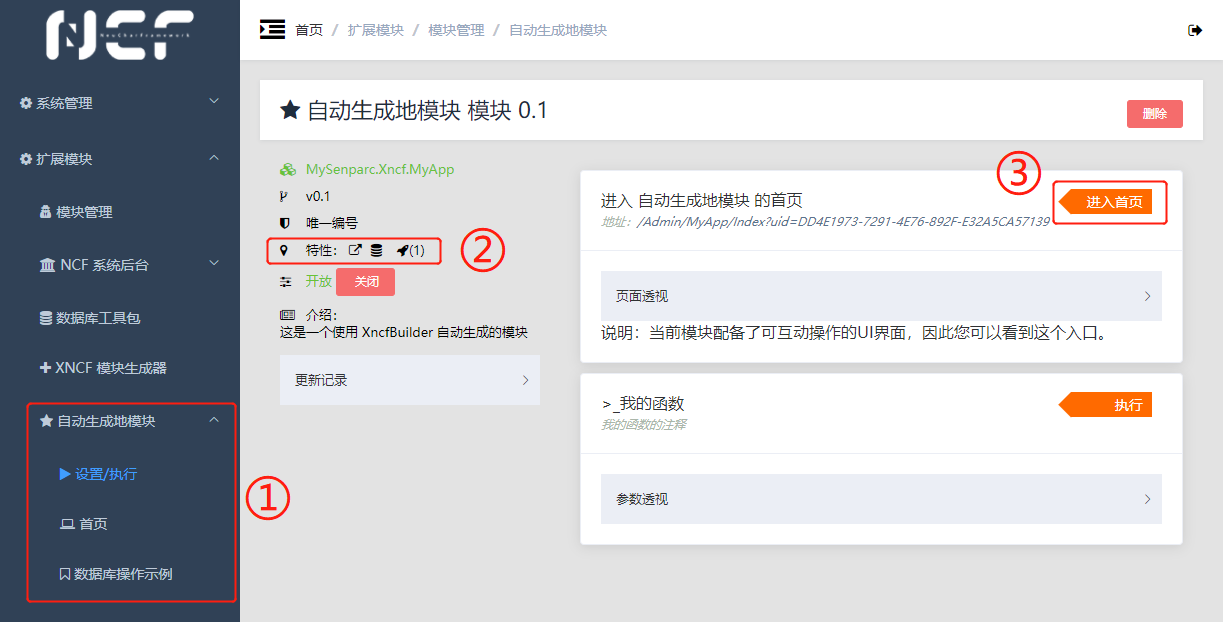
Return to the webpage, and you can see the module information in the enabled state:
Tip
①: You can see that the module menu supporting web pages has an additional directory compared to the menu without web pages (such asDatabase Toolkit). In addition to theSettings/Executepage that everyone has, there is also a custom web page.
②: In the "Features" column, you can see the features supported by the current module: web pages, database, execution methods (Function).
③: Xncf modules with web page functionality are required to define a "homepage", which can be quickly accessed on this page.
Function Demonstration
Before understanding the internal files and principles, let's first look at the demonstration of the functions completed by this Sample.
Function
The function feature is used to complete a simple, small-grained operation, supporting visual operation in the NCF backend and can be executed using code.
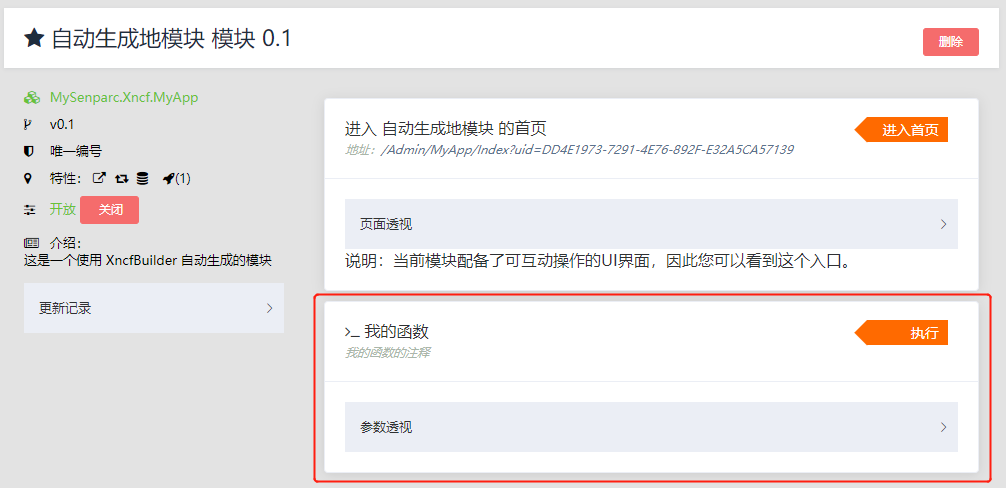
Open the default page of the module settings (i.e., the [Settings/Execute] menu), and you can see the [Execute] button on the right. Each [Execute] button represents a function (Function):
Web Page
Tip: This function will automatically perform addition, subtraction, multiplication, division, and square calculations based on the parameters entered by the user. Click the [Execute] button on the right side of "My Function" to pop up the visual operation interface of this function, which defines all the variables required for this function. These variables can be freely set through code. The example includes name, number 1, number 2, operator, and the option to calculate the square.
Fill in the information and set the options. The following configuration will perform the calculation of
(2 × 3)²After clicking [Execute], the calculation result is output:
On the result page, we can also see a "Download Log" link. This log will only be temporarily stored in the server cache for 5 minutes. Download and open it to see that the log records the complete calculation process:
The web page functionality uses the capabilities of ASP.NET's page Area. Each Xncf module can define one or more Areas, and of course, pages can also be created directly in the root directory. The development process is no different from ordinary projects.
Database
NCF provides multi-database support for all modules and supports migration between multiple databases. At the same time, NCF also configures a complete set of basic methods for database access.